ds9_imstats: an easy wrapper.
The routine ds9_imstats is basically a wrapper code that runs the steps outlined above. It does a few extra things like revising the regions file associated with an image. It also prepares the table files need for plotting image image properties using, amoung other tools, the xyplotter_auto routine. Here is a simple calling sequence:
 # View and measure the image B.fits
ds9_imstats B.fits Y
Usage: ds9_imstats a.fits Y
arg1 - FITS image name
arg2 - run in interactive mode (Y/N)

# I view the paramter names and labels in a parlab file:
cat midodata.imstats.parlab
Xpix   X pixels (aperture X center)
Ypix   Y pixels (aperture Y center)
Mean   Average value per pixel in aperture
Sigma  sigma (per pixel) relative to average
Merr   mean error about the average
Npix   number of pixels in aperture

# I plot Mean vs. Sigma for my marked regions.
xyplotter_auto midodata.imstats Mean Sigma 1
Usage: xyplotter_auto fits_review hours bias 1
arg1 - basename of table file (i.e. A for A.table, A.parlab)
arg2 - parameter name for X axis
arg3 - parameter name for Y axis
arg4 - integer id
One of the nice features of this tool is that you can elect to save the final set of markers in a local ds9 regions file at the end of each run. If you do this, then the next run of ds9_imstats will come up with these markers already drawn in. In this way we can easily change the image markers with multiple runs, adding or correcting regions with each run.
Customizing the ds9 gui appearance.
It is frequently necessary to chnage the size and appearance of the ds9 gui used by ds9_imstats. For instance, when I use my laptop at low screen resolution, I want to make a gui that is sized to use as much of the screen as possible. I also want to remove features like the image Panner or Magnifier features to free up more screen area devoted to the displayed image. As with many of my routine, ds9_imstats opens the ds9 gui with the routine ds9_open. In this routine is the internal capability to call the script ds9_strip, which allows one to turn off certain ds9 features. These options are exercised using the presence of local file in the cuurent reduction directory:
ds9_open.Size  == specify the ds9 gui size
% cat ds9_open.Size
1000 700

ds9_strip.code  == turn off ds9 features
% cat ds9_strip.code
bo
These may seem like mundane additions, but they help a lot when yu are reducing certain types of images. For example, when view PFC images on my home desktop I can get a large screen, with the PFC image nicely filling the viewing area with:
% cat ds9_open.Size
800 950

ds9_strip.code  == turn off ds9 features
% cat ds9_strip.code
bo
Below I show how the ds9 window looks when we use the example above.
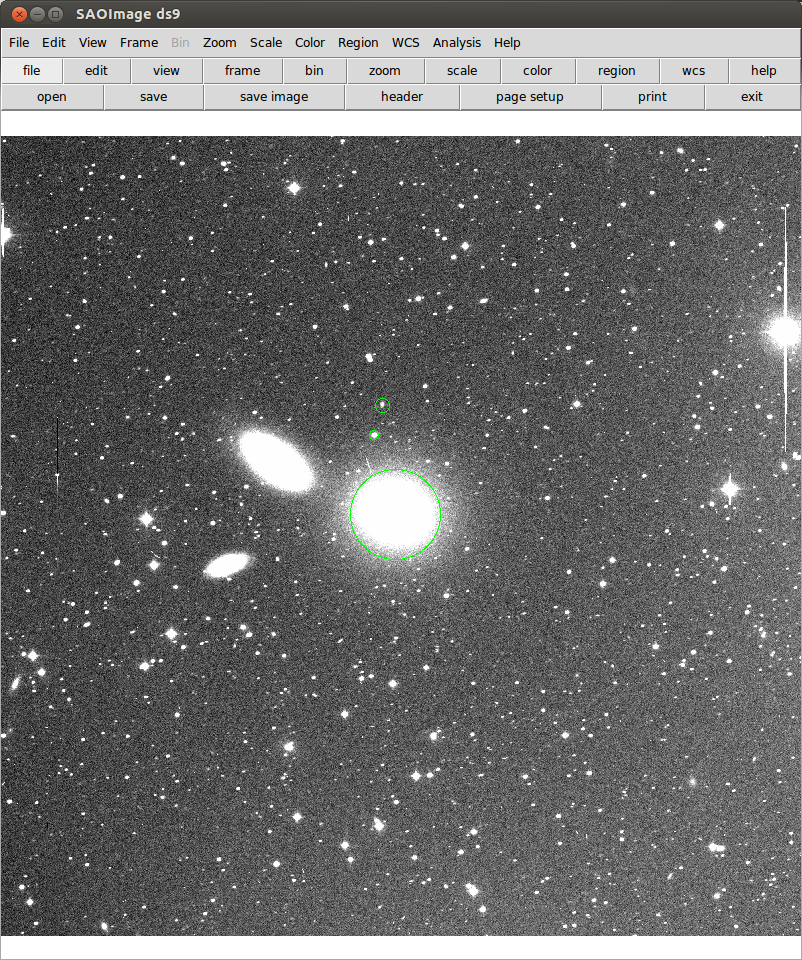 |
| Here is customized viewd of a McDonald PFC image using the ds9_imstats routine. The tool that handles the customization is ds9_open (a script used by many of my interative ds9 routines like usno_identify, acm_lrs2_view, etc...). By using the "bo" option in a local file named "ds9_strip.code" I turned off most of the ds9 tool except the task buttons. By using the local file named "ds9_open.Size" I was able to set the size of the ds9 gui so that the zoomed PFC image nicely fills the image viewing area. |
Cleaning up after ds9_imstats.
The ds9_imstats script is easy and effective, but it is messy. By messy I mean it will leave your directory full of all sorts of files.
# BEFORE the ds9_imstats run:
ls
B.fits	S/

# AFTER the ds9_imstats run:
ls
a.jpeg	    junk.4		midodata.2_varnames	  midodata.XY
B.fits	    midodata.1		midodata.5pars		  midodata.XY_explain
B.info	    midodata.1_explain	midodata.5pars_explain	  pars.in
datf	    midodata.2		midodata.imstats	  S/
ds9.reg     midodata.2_explain	midodata.imstats_explain  xpans.answer
id.objects  midodata.2.parlab	midodata.imstats.parlab
id.regions  midodata.2.table	midodata.imstats.table

# I use a cleaning script:
ds9_clean
ls
B.fits	B.info  B.reg 	S/
This seems a small point until you have a large directory full of all sorts of files and you just want to remove the ds9_imstats files. Note that two files are left untouched: B.info and B.reg. The first is the general information file connected with the input FITS image (i.e. B.fits). Many codes write to and read from this type of file, so we want it to remain. The regions file (B.reg) may be useful for future ds9_imatsts run, so it is preserved also.
Back to SCO code page